Beach Cruiser Bikes Setup Guide: How to Teach a Child to Ride
The first experience with Beach Cruiser Bikes is easier when assembly, fit, safety checks, and teaching happen in the right order. You can create a calm learning session by completing one observable step at a time.
Step 1: Read before assembling
Open the product instructions and identify the exact model and option. Lay out the included parts on a clean surface, protect painted areas, and use the specified tools. If the product arrives partly assembled, that does not mean the safety checks are complete.
Step 2: Complete assembly in order
Follow the manufacturer's sequence for the handlebar, front wheel, pedals, saddle, training aids, accessories, and reflectors as applicable. Left and right parts may use different threads or orientations. Never force a fastener that does not start cleanly, and use specified torque values when provided.
Step 3: Set a conservative first fit
For Beach Cruiser Bikes, begin with a position that lets the rider mount and stop calmly. Keep all seat and handlebar posts within marked insertion limits. Align the controls so wrists remain comfortable and the child can reach them without shifting the whole hand away from the grip.
Step 4: Check the machine before teaching
- Wheels rotate normally and are retained correctly.
- Steering moves freely without looseness.
- Brakes operate as intended.
- Tires match the pressure guidance printed for the product.
- Fasteners and adjustment points are secure.
- Accessories cannot interfere with wheels or controls.
Step 5: Teach stopping first
In a traffic-free area, hold the product steady while the child finds a relaxed position. Explain the stopping action, then practice it repeatedly at walking speed. You want an automatic, controlled response before adding longer coasting, pedaling, or tighter turns.
Step 6: Use short learning blocks
Ten focused minutes can be more productive than an exhausting hour. Practice one skill at a time: mounting, looking ahead, moving straight, stopping at a marker, and making a wide turn. Finish after a small success so the child is willing to return.
Step 7: Reduce help gradually
Support the rider's body or the product only as much as needed. Avoid pulling the handlebar because that changes steering input. Tell the child what you will do before releasing support, and stay close enough to intervene without surprising them.
Practice with the exact configuration in mind
The setup sequence should follow the instructions supplied with the product. Examine XJD Beach Cruiser Bike with Rear Rack & V-Brake – Mint Green, XJD Beach Cruiser Bike with Rear Rack & V-Brake – Pink, and XJD Beach Cruiser Bike with V-Brake – Purple, 26-Inch, confirm the selected option, and browse the complete Beach Cruiser Bikes selection if you still need to compare configurations. A feature shown on a related item should never be added to your setup assumptions.
After the first ride
Recheck fasteners, alignment, and adjustments because newly assembled parts can settle. Ask what felt easy and what felt difficult. Discomfort, hard-to-reach controls, or repeated loss of balance may point to fit or setup, not a lack of effort.
Learning with Beach Cruiser Bikes should feel progressive, not rushed. Careful assembly, a fit the rider can control, and one skill at a time give you a safer and more encouraging path from the first start to independent riding.
Recommended products
-
Save 14%
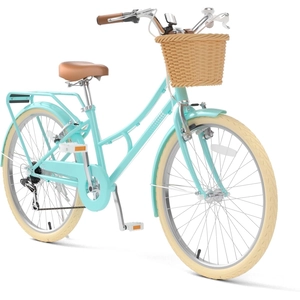
XJD Beach Cruiser Bike with Rear Rack & V-Brake – Mint Green
XJD Beach Cruiser Bike with Rear Rack & V-Brake – Mint Green gives parents v…
Beach Cruiser Bikes Wheel Size 20 Inch / 24 Inch / 26 Inch Recommended Height 122–200 cm Training Wheels No Geared 20 Inch -
Save 14%
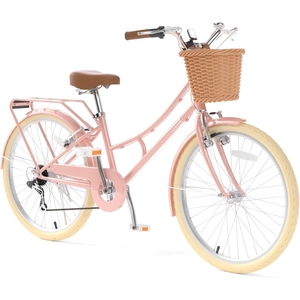
XJD Beach Cruiser Bike with Rear Rack & V-Brake – Pink
XJD Beach Cruiser Bike with Rear Rack & V-Brake – Pink gives parents verifie…
Beach Cruiser Bikes Wheel Size 20 Inch / 24 Inch / 26 Inch Recommended Height 122–200 cm Training Wheels No Geared 20 Inch -
Save 5%
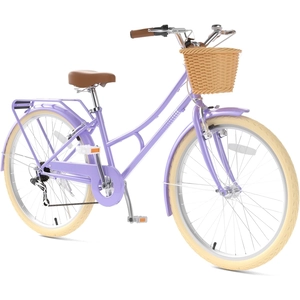
XJD Beach Cruiser Bike with V-Brake – Purple, 26-Inch
XJD Beach Cruiser Bike with V-Brake – Purple, 26-Inch gives parents verified fit…
Beach Cruiser Bikes Wheel Size 20 Inch / 24 Inch / 26 Inch Recommended Height 122–200 cm Training Wheels No Geared Purple / 26 Inch -
Save 20%
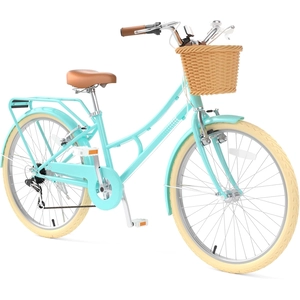
XJD Beach Cruiser Bike with U-Brake – Green, 24-Inch
XJD Beach Cruiser Bike with U-Brake – Green, 24-Inch gives parents verified fit …
Beach Cruiser Bikes Wheel Size 24 Inch / 26 Inch Recommended Height 137–200 cm Training Wheels No Single Speed Green / 24 Inch