Kids Bike Seat Height: How High Should the Saddle Be?
The right kids bike seat height depends on the skill being practiced. A cautious beginner usually needs easier ground contact for starting and stopping. A confident pedal rider can use a somewhat higher saddle for a smoother leg extension. In both cases, the child must stay centered, reach the controls and stop safely.
Do not use saddle height to rescue a bicycle that is fundamentally too large. Confirm the XJD wheel-size fit by rider height and inseam first, then fine-tune the seat within the marked adjustment range.
Quick seat-height guide
| Riding stage | Useful starting position | What to watch |
|---|---|---|
| Balance practice | Feet can contact the ground securely while seated | Child can push, glide and stop without leaning the bike sharply |
| First pedal rides | Low enough for confident starts and planned foot-down stops | Knees are not cramped at the top of the pedal stroke |
| Confident pedaling | Higher for an efficient stroke, within the manual’s fit guidance | Knee remains slightly bent at the bottom; hips do not rock |
These are setup goals, not universal measurements. Frame geometry, crank length, tire size and rider proportions change the result.
Step 1: begin with the child’s current skill
If the rider is learning balance, the seat should support controlled foot contact. If the rider can already start and stop independently, raise the saddle in small increments and observe the pedal stroke. Avoid making a large change immediately before a longer ride.
Ask the child how the bike feels, but also watch the body. Raised hips, pointed toes, side-to-side rocking or sliding forward can indicate that the saddle is too high. Knees that remain sharply bent throughout the stroke can indicate that it is too low or the bicycle is too small.
Step 2: make the adjustment safely
- Place the bike on level ground and note the current saddle position.
- Loosen only the seat clamp described in the product manual.
- Move the post a small amount while keeping the saddle aligned with the frame.
- Never raise the seatpost beyond its minimum-insertion or maximum-height mark.
- Tighten the clamp to the manual’s specified method and torque, then confirm that the saddle cannot twist.
If the post is already at its limit, do not improvise an extension. Recheck the bicycle size. Likewise, cutting a seatpost or changing parts should be left to qualified service when the manufacturer permits it.
Step 3: use a supported pedal check
Have an adult hold the bicycle upright while the child sits normally with shoes on. For a confident rider, placing the heel on a pedal at its lowest point can help reveal whether the leg reaches without the hips rocking. When the ball of the foot returns to the normal pedaling position, there should be a comfortable bend rather than a locked knee.
A beginner’s saddle may intentionally sit lower than this efficiency-focused check suggests. Control comes first. Revisit the height as starts and stops become predictable.
Three XJD bikes to use for a fit comparison
- XJD Girls Bike with Training Wheels & Basket – Light Purple: compare the chosen wheel size and training stage before setting the saddle.
- XJD Kids Bike Blue: available across child-size options, making the selected SKU—not the shared product name—the source for fit.
- XJD 20-Inch Freestyle BMX Bike without Pegs – Blue: a 20-inch BMX-style option whose riding position should be checked independently from a family bike.
Open the exact listing and use the delivered manual. Saddle range cannot compensate for unreachable brakes, poor stand-over clearance or a wheel size outside the rider’s fit.
Recheck the rest of the cockpit
After changing the saddle, have the child reach the grips and brake controls again. A higher seat can change how far the handlebar feels. The rider should keep relaxed elbows, look forward and use the brakes without stretching fingers away from the grip.
Complete a slow start, wide turn and controlled stop on a flat, traffic-free surface. Return to the previous position if confidence or control decreases.
How often should parents check?
Growing children need repeated setup checks. A quick review every few months—and after a growth spurt, shoe change, crash or bike handoff—can catch a saddle that has become cramped or loose. Inspect the clamp and seatpost during the normal pre-ride check too.
Frequently asked questions
Should both feet be flat on the ground?
That can support a new balance rider, but it is not the final pedaling position for every child and bike. Match ground contact to skill and the manufacturer’s instructions.
Why does my child’s knee hurt after raising the saddle?
Stop riding and recheck fit rather than diagnosing from the saddle alone. Height, fore-aft position, shoe placement and the bicycle size can all contribute; persistent pain warrants qualified medical or bike-fit advice.
Can I raise the seat above the mark for more growth room?
No. The insertion mark is a safety limit. If the child needs more height than the approved range, compare the next suitable bike size.
Source note: The setup approach reflects children’s bicycle manuals from Canyon and woom, together with XJD Bikes’ current size-led product range. Always follow the manual supplied with the exact bicycle.
Recommended products
-
Save 15%
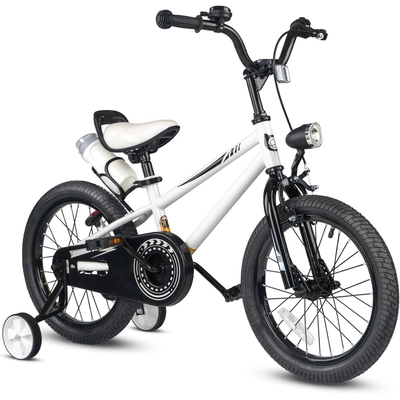
XJD Boys & Grils Bike white
XJD Boys & Grils Bike white brings the recorded fit, riding and configuratio…
Training Wheel Bikes Training Wheels Yes 16 Inch -
Save 15%
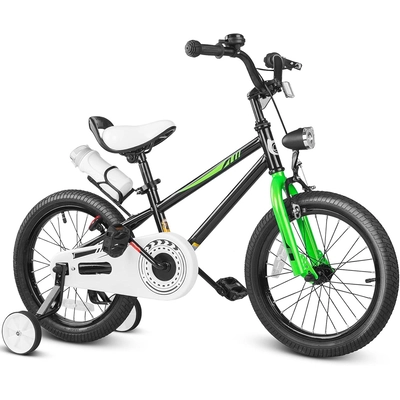
XJD Boys Bike Black
XJD Boys Bike Black brings the recorded fit, riding and configuration details to…
Training Wheel Bikes Training Wheels Yes 14 Inch