Balance Bikes: The Complete Parent's Guide
Balance bikes are pedal-free bicycles that help children learn steering and balance. Choose one by measuring the rider, checking control in person, and refusing an oversized fit.
What to measure before shopping
Begin with the child’s current height and inseam, measured while wearing the shoes they will normally use for riding. For inseam, have the child stand straight with feet slightly apart and measure from the floor to the crotch. Record the numbers rather than relying on age or clothing size.
These measurements help you screen candidates, but the decisive step is a real fit check. Wheel size is only a starting point because seat height, frame shape, handlebar position and the child’s proportions can differ.
How a balance bike should fit
At the lowest usable seat position, a beginner should be able to place both feet securely on the ground, with enough knee bend to walk, push and stop without stretching. The child should not have to balance on tiptoes or lean the bike sharply to reach the ground.
Check the complete riding position:
- Stand-over: The child can stand over the frame comfortably without being crowded by it.
- Reach: The handlebars are reachable with relaxed arms, and the child can turn them both ways without twisting or leaning forward excessively.
- Control: The rider can hold the bike upright, steer, walk it forward and stop using their feet with confidence.
- Brake reach: If the model has a hand brake, the child can reach and operate it while maintaining a secure grip. Do not assume every balance bike includes one.
Do not buy a larger bike solely to leave room for growth. A bike that may fit later can obstruct learning now. Choose for present control, then follow the product manual for adjustment limits and correct setup.
Use wheel size as a starting point
XJD Bikes’ size guidance provides the following age and height starting points. Height is more useful than age, and neither replaces checking inseam, reach, brake control and confidence on the exact bicycle.
| Wheel label | Age starting point | Rider height starting point |
|---|---|---|
| 12 Inch | 3–4 | 34–40 in / 86–102 cm |
| 14 Inch | 3–6 | 37–45 in / 94–114 cm |
| 16 Inch | 4–7 | 40–48 in / 102–122 cm |
| 18 Inch | 5–9 | 43–52 in / 109–132 cm |
| 20 Inch | 7–12 | 48–60 in / 122–152 cm |
| 24 Inch | 10–14 | 54–64 in / 137–163 cm |
| 26 Inch | Youth and adults | Over 60 in / 153 cm |
Overlapping ranges are normal; they do not make two sizes equivalent. If a child falls near a boundary, compare both candidates through an individual fit check rather than automatically sizing up.
What to compare between balance bikes
First eliminate any model that does not permit secure ground contact and comfortable steering. Among the remaining options, compare how easily the child can mount, push, coast, turn and stop. Observe the rider instead of asking only whether the bike “feels fine”; children may accept an awkward fit because they like its appearance.
Also inspect the exact manual before purchase or use. Confirm the stated adjustment range, assembly instructions, load limit and any component-specific maintenance requirements there. When instructions are missing or the setup is uncertain, use a qualified bicycle mechanic rather than guessing at compatibility, torque or assembly procedures.
How the supplied catalog option relates
The XJD Girls Bike with Training Wheels & Basket – Light Purple is listed as a training-wheel bike in 12 Inch, 14 Inch and 16 Inch sizes. It is not a balance bike, so these versions are comparison points for wheel-size and riding-stage decisions, not substitutes for a pedal-free model. They may be relevant if your child is ready for pedals and you are comparing training wheels with balance-first learning.
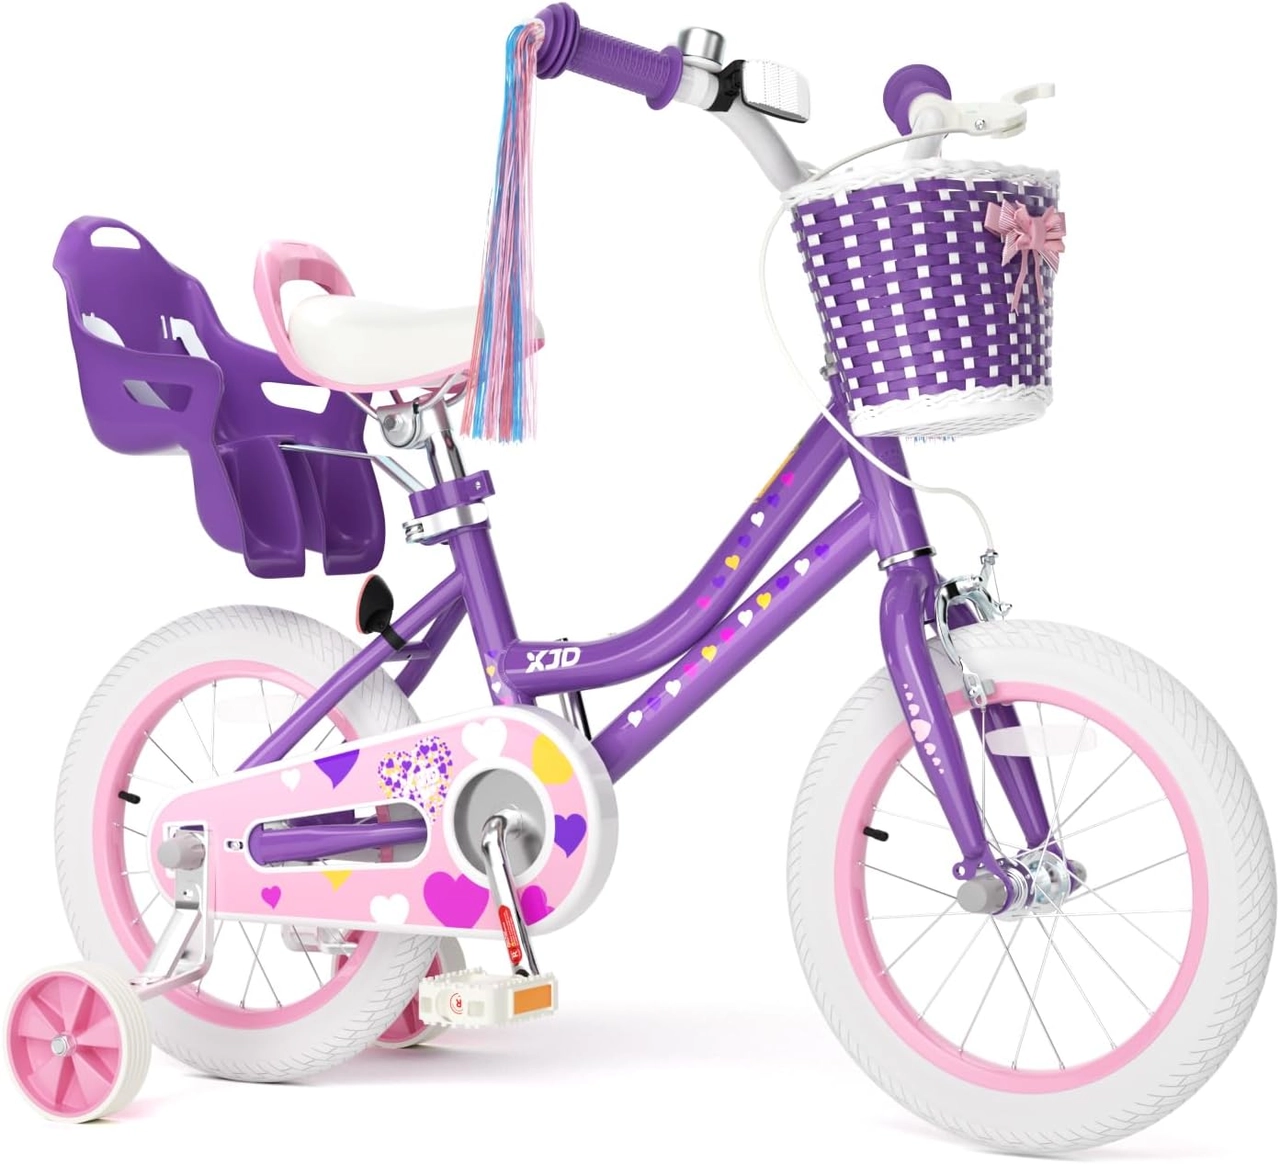
Use the applicable size starting point above, then check the exact bicycle in person. The basket and light-purple description identify the catalog model but do not establish fit. No supplied facts establish its materials, weight, brakes or adjustment range, so consult its manual for those details.
Prepare for the first rides
- Choose a flat, open riding area away from traffic, steep slopes and obstacles.
- Fit a bicycle helmet so it sits level and secure, using its straps exactly as the helmet manufacturer directs.
- Start with walking while seated, then longer pushes. Let coasting develop after the rider can steer and stop consistently.
- Recheck the fit as shoes, posture, confidence and height change. Stop using the bike when safe adjustment can no longer preserve ground contact and control.
Your next step is simple: measure height and inseam today, shortlist only balance bikes that match those measurements, and have the child demonstrate mounting, steering and stopping before you decide.